• Skip to primary navigation
  • Skip to main content
  • Skip to primary sidebar

GOODEness Gracious

Cooking up GOODe Food with a Side of Life

Come and sit a spell around our kitchen table where we laugh often, eat GOODe food and speak life!
Follow Along Google Plus Contact Me on Facebook on Twitter Contact Me On Pinterest
stats counter
  • Home
  • About Us
    • GOODEness Gracious
    • GOODe People
  • Favorites
    • Recipes
    • Posts
    • Quotes
  • Recipes
    • All Recipes
    • Appetizers
    • Baking
    • Beverages
    • Bread
    • Breakfast
    • Cakes
    • Casseroles
    • Chocolate
    • Cookies
    • Crockpot
    • Desserts
    • Freezer Friendly
    • Gooseberry Patch
    • Grilling
    • Lite
    • Marinades
    • Meat
      • Beef
      • Chicken
      • Pork
      • Seafood
      • Turkey
    • Pasta
    • Sandwiches
    • Sides
    • Soups
    • Veggies
  • Freezer Cooking
    • FREEZE-o-RAMA
    • Freezer Friendly Recipes
  • Disclosure, Disclaimer and Privacy Policies

Home » Techy Tips » Inserting a Photo in a Document

Inserting a Photo in a Document

November 9, 2011 By Cris Leave a Comment

Pin
Share
Tweet
Share

Dear Reader,

As someone who embraces my geeky side, over the years  I have  often found myself as an on-the spot computer assistant in my work, personal and family life…

So, I decided to start putting some of these tips on the blog because knowledge is power and I for one just love learning a thing or two!

Now somethings I plan to share may seem super simple to you or may not be your cup of tea… so feel free to skip if ya want.

Today I want to share with you a simple tip to help you place your photo where you want it in a document.

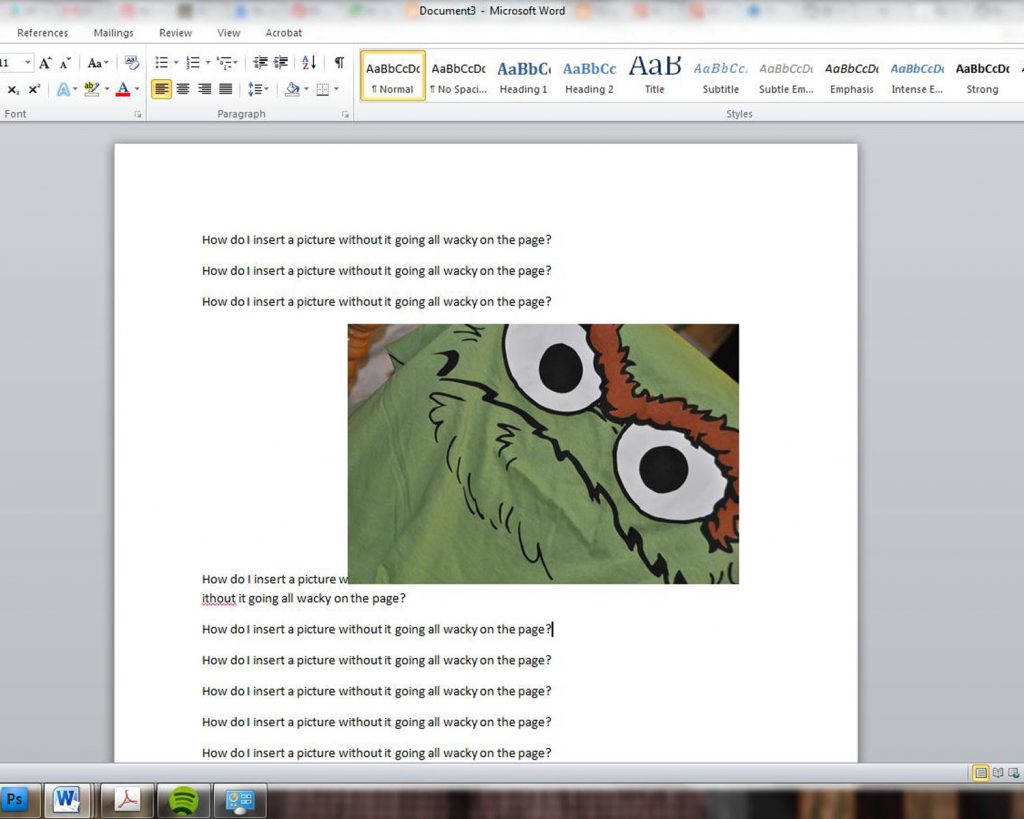
With all those Family Christmas Letters, Craft Fairs and Bake Sales out there Microsoft Word can come in handy, however, it can get a little frustrating when you go to place a photo in your document and it pulls one of these…

I don’t know about you, but it makes me a little “Grouch-y” to see my photo messing up all my text.

This happens because Word is set to insert your picture “In Line  with Text” (Which makes no sense in my book, but hey).

This means wherever your cursor is, there your photo will be also… even if that be in the middle of a sentence.

Luckily, we can change this…

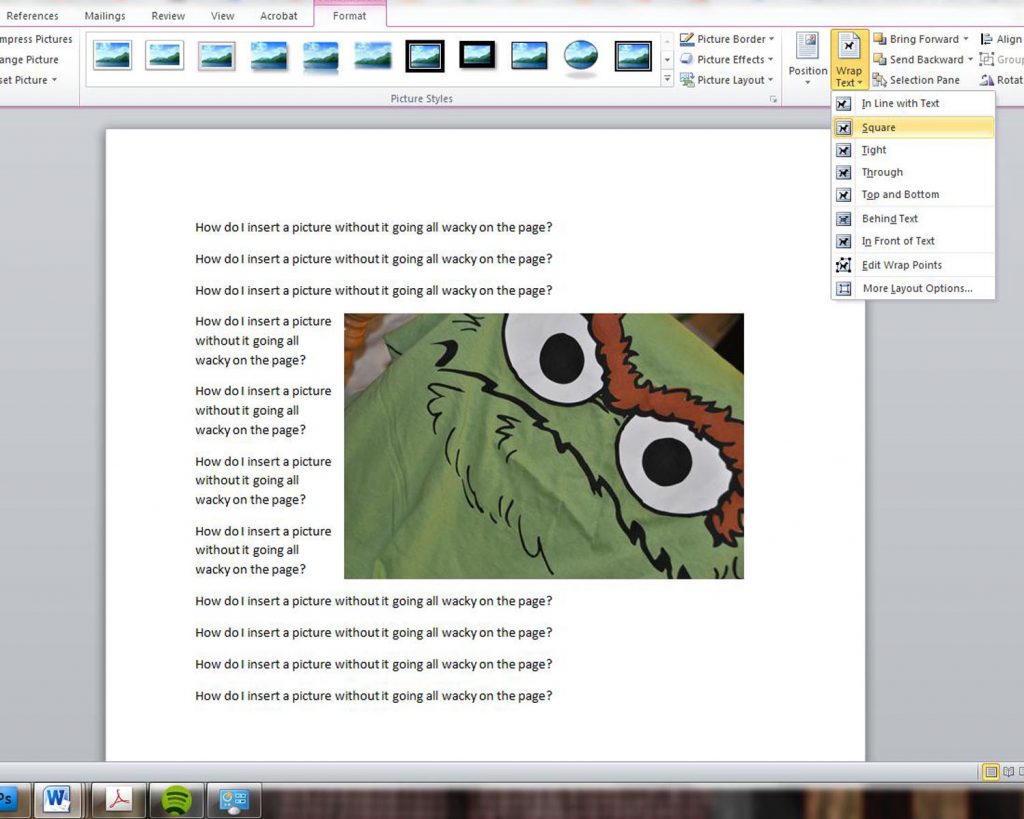
Depending on your version of  Word, you will need to find how to change the “Wrap Text” feature. In the newest version of Word it is under the “Picture” Tab. (If you are using an older version, use the help feature to search for “Wrap Text” and it should tell you where to find it.)

Once you find the “Wrap Text” options, you will want to pick the feature that fits your needs.

In the photo above I chose “Square” which means no matter where I move the photo, the text automatically repositions itself neatly around my photo.

Ta-Dah!

Now I can place my pictures and move them around to get them positioned just right.

About Cris
I am the mama behind GOODEness Gracious and the owner of Cris Goode Solutions. Here at GOODEness Gracious, we like to keep it light and fun as we cook up family meals, share our super mommy secrets and chat it up about the GOODe life:) So come on in and sit a spell.

Facebook  • Twitter • Google • 

Pin
Share
Tweet
Share

My Other Posts You Might Be Interested In

Filed Under: Techy Tips Tagged With: Beginner Tips, Microsoft Word

Previous Post: « 30 Soup, Stew & Chili Recipes To Warm Up To
Next Post: The Naming of a Unicorn »

Reader Interactions

Leave a Reply Cancel reply

Your email address will not be published. Required fields are marked *

Recipe Rating


Primary Sidebar

Our Family Vlog

Support This Site By Shopping Amazon Here

Send Us Your Questions

weekly chat questions signup

GOODe People Who Grow Our Food

More Great Recipes

Goodeness Gracious

Copyright © 2022 · Goodeness Gracious · All Rights Reserved ·
DISCLOSURE, DISCLAIMER & PRIVACY POLICIES