Note: We use affiliate links in our post.
Do you use Photoshop or the much less expensive at home version Adobe Photoshop Elements
? (Psst… if you are a student, you can get the pro version at a steep discount
.)
Dear Reader-
I am often asked to give folks pointers in Photoshop.
Learning Photoshop
Learning Photoshop was one of my life goals several years ago, and I am living proof that where there is a will, there is a way 😉
I often say I am an average amateur photographer with a mad passion for Photoshop and that is how I roll 😉
How did I learn?
Hands down, Total Training. (Psst… make sure you get the right Total Training for your specific version of Photoshop).
Quick Photoshop Tip
What was the best- most immediate- most beneficial tip I learned?
Levels adjustment.
Levels can make a “meh” photo pretty decent and can take a decent photo to wow.
Levels can also make your actions work really well…
or flop…
Adjusting Levels is Easy
But most of all, adjusting levels is uber easy.
1. Crop your photo to the desired size before adjusting levels.
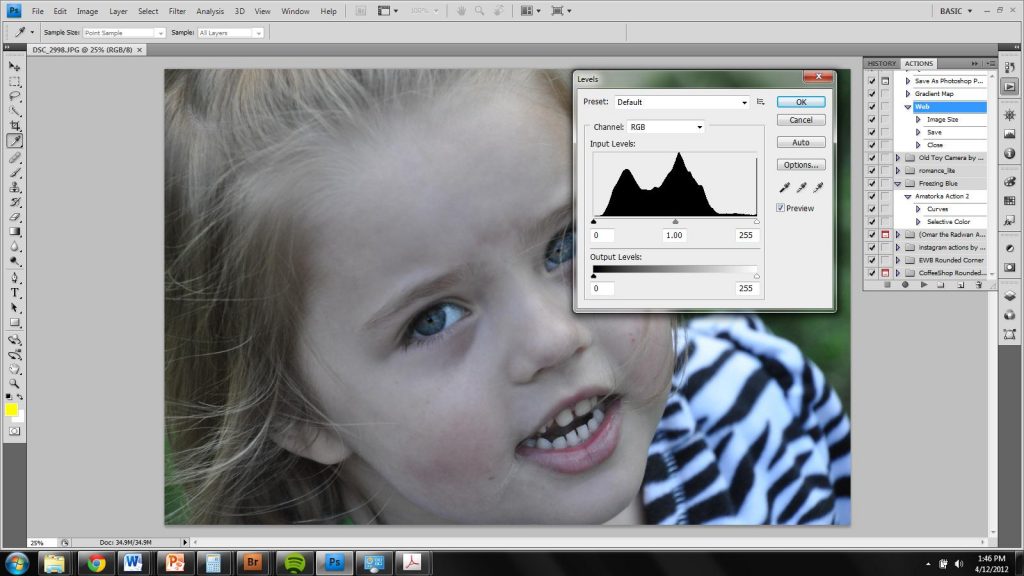
2. Click Image/Adjustments/Levels to bring up the levels window.
This is your histogram… a big word that just tells you where the shades fall in your image 0 to 255 or from white to black. Notice before changing anything that there isn’t much in the 0 area and a whole lot of nothing way over in the 255 area.
Really great photographers have full histograms that are nice and even across the graph and could tell you way more than I could about how to get that nice rich photograph that is properly exposed and utilizes all the shades available to them.
I can tell you how to fake it to a certain degree. Total Training could tell you better, but I can get you by 😉
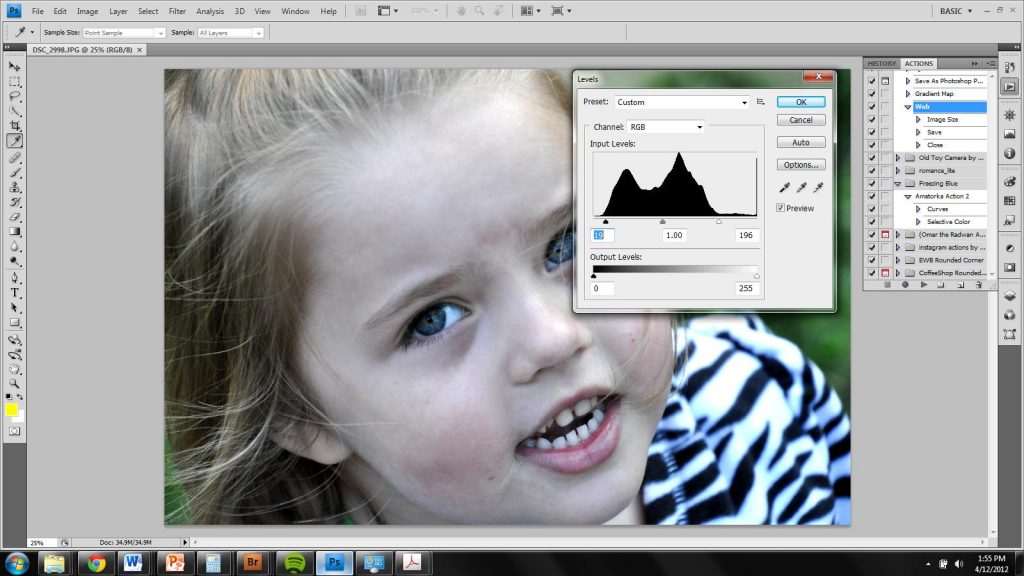
3. Move the little triangles immediately below the graph to match the beginning and ending of your graph. You will notice in this photo that meant my range for this photo was more 19-196 than 0-255 (see I told you I wasn’t a great photographer).
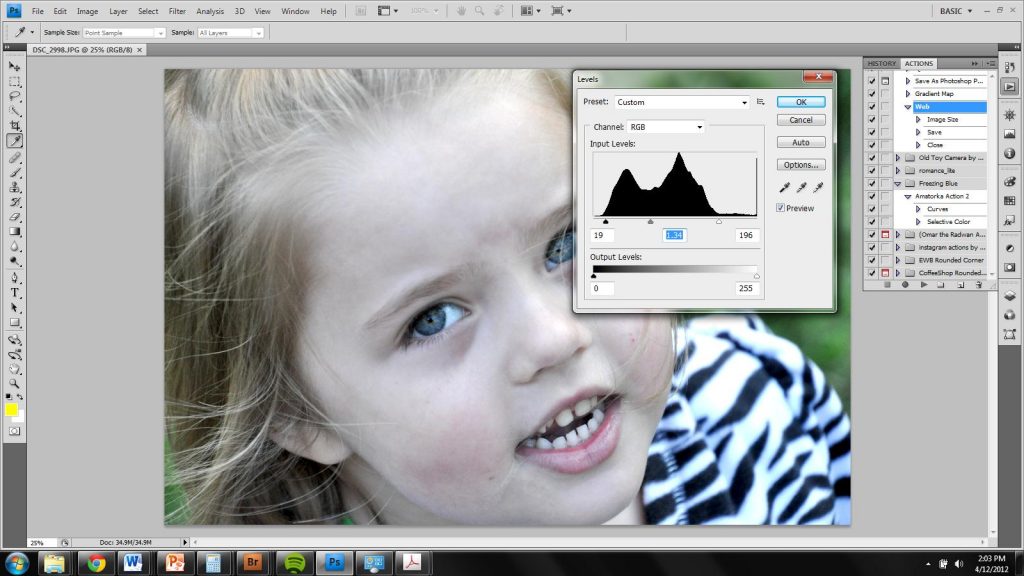
4. Leave the middle triangle alone unless you need to brighten or darken the mid-tones in the image to prep it for an action. When using one of my favorite actions, I usually have to lighten my midpoints up quite a bit to achieve the look I am going for. You lighten your mid-tones by moving the middle triangle to the left (in this case to 1.34).
5. Click OK and you are ready to finish your editing.
Note: Levels is a one shot deal… meaning don’t permanently change your levels and then go in and do it again. Go back in your history and start over or use adjustment levels to make your changes.

Finished editing with adjusting levels first…
Same action (minus border) without adjusting levels first.
Next Techy Tips post I will share my point of view on the wonderful world of actions! Stay Tuned!
Disclosure: Affiliate links were used in this post, however, no puppies were harmed in the making of this post ;P


hannah Ngo-Whitcomb says
I have PS elements and no clue how to use it!! Thanks for the tips.